Of the two types of video compression methods we saw in a previous knowledgebase article:
You should be able to get 250 MB per hour of 720P (1280 x 720) video; OR; in other words around 4 hours per GB of 720P (1280 x 720) video. If you are not able to get this result, please contact Arride, we can try to help.
1. To start with ensure that the source video file you are compressing is a high bit rate video file
with video stream at a high bit rate like 4000 to 5000 kbps and audio at 128 to 256 bkps.
Note the source bit rates given here are indicative for eLearning content with little to
no action scenes and human voice throught the video. For film, animation and other action content,
if you do not know the source stream settings then contact Arride for recommended source settings.
2. Download and install Handbrake (Google search for Handbrake and install
from
handbrake.fr website).
Click on the Downloads and Install the 32 bit version even on 64 bit Windows PCs. Note: This point IS
IMPORTANT - the 64 bit version of Handbrake per our experience, has bugs in it.
3. Run Handbrake and open your video file , if Handbrake shows an error like
'unable to read file/unable to read video stream/audio stream' then
try to play the video in Windows Media Player (NOT VLC or any other player).
If video does not play in Windows Media Player then download and install either:
1)
K-Lite Codec Pack (Preferable), download link
K-Lite Codec Pack.
- OR -
2) FFDShow (Install only if Handbrake does not recognise video file even after K-Lite Codec Pack Installation)
- suggested download link:
FFDShow
After either or both are installed, reboot the system and video should play in Windows Media Player.
If it does not contact Arride, we might be able to help. If video is playing in Windows Media Player,
then proceed to read further, if not stop here and fix the issue.
4. In Handbrake open the video file you want to compress. Make the following selections on the Picture Tab:
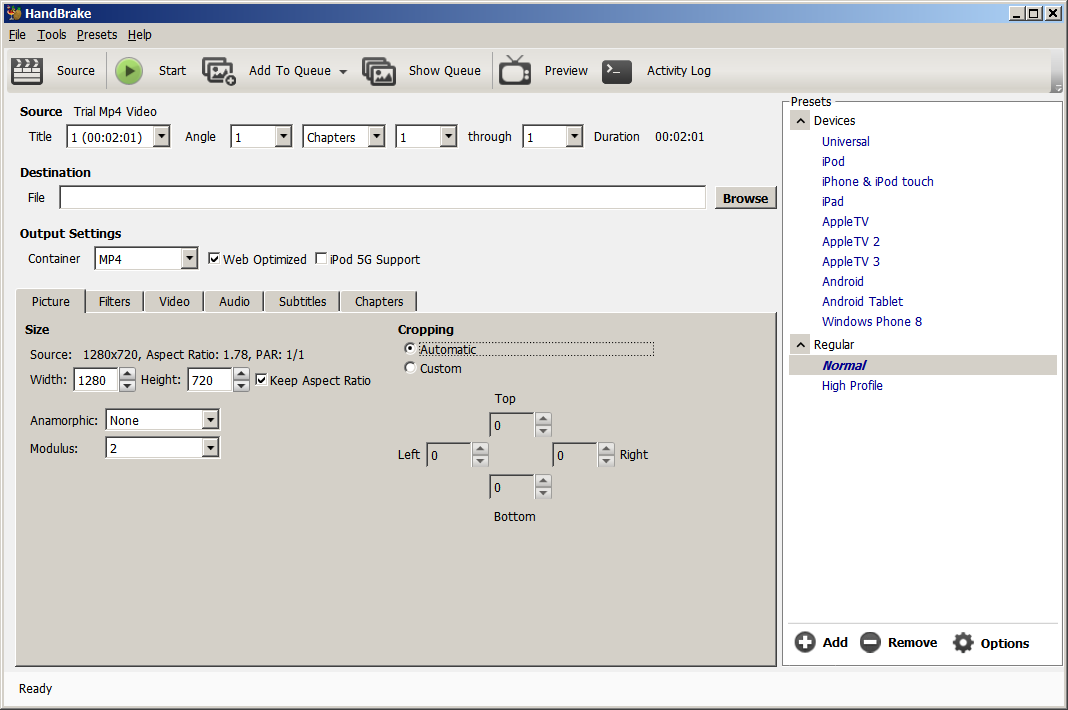
Note the options selected: Web Optimized. Anamorphic: None (Leave the default Modulus as 2).
Try the following with 'Keep Aspect Ratio' check box checked.
To convert videos to 720P HD (Recommended):
Enter 1280 as the Width, the height should be automatically calculated as 720. Please make sure
that height is either 720 exact or somewhere around 720 or lower. If it is higher that 720 then
the max recommended is 750. If it is showing lower than 720 then you can go as low as 660 , any lower
and the video will appear like a horizontal ribbon.
If converting 1080P HD:
Enter 1920 as the Width, the height should be automatically calculated as 1080. Please make sure
that height is either 1080 exact or somewhere around 1080 or lower. If it is higher that 1080 then
the max recommended is 1110. If it is showing lower than 1080 then you can go as low as 900, any lower
and the video will appear like a horizontal ribbon.
If the video height is not calculating within the recommended limits with the keep aspect ratio check box checked,
then uncheck the check box and enter the recommended height. This WILL vertically squeeze your video to
confirm to current displays. So watch your video after conversion to determine whether the squeeze is
within acceptable limits.
Make sure Cropping is set to 'Automatic'.
Make sure that the video Source dimensions are showing up correctly and matching your source video.
If not stop here, there is an issue with the source video file.
If you want to reduce the size of the output compressed video, you can do so here
by changing the width - the height should change automatically as 'Keep Aspect Ratio' is checked.
5. Leave the Filters tab as is, no changes should be necessary on it for high quality digital video camera sources.
6. On the Video tab make the following settings:
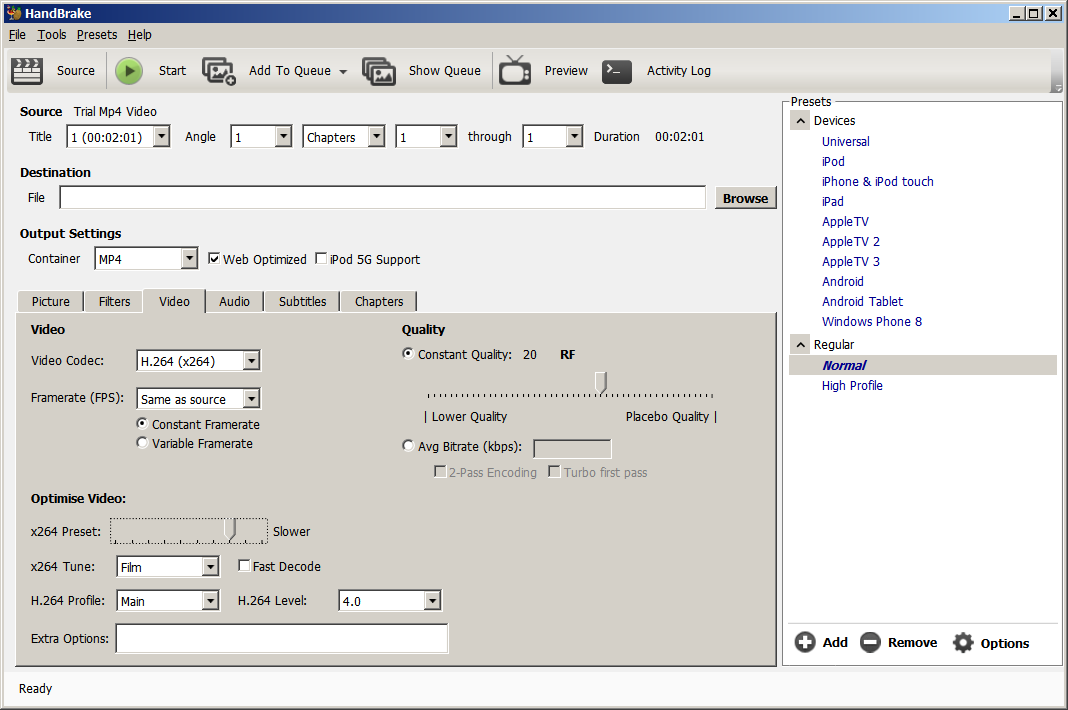
Video Codec: H.264 (x264). Make sure 'Constant Framerate' radio button is selected.
Note:
This is important. Variable frame rates pose lots of compatibility problems.
Note: Variable speed playback requires Constant Framerates. If you intend to allow videos to be played back
at variable speed, please ensure that you are encoding MP4 videos at Constant frame rate.
To check your video encoding frame rate and lots of other info about your videos, use a tool like MediaInfo
Click here to download.
Move the Optimize Video slider to the right to Slow/Slower or further to the right. The further right the slider is moved the slower the compression with a higher output quality. Generally Slow or Slower setting is a good balance between compression time and quality.
x264 Tune select 'Film' in the drop down.
For H.264 Profile make sure Main is selected and for H.264 Level the default 4.0 normally works. Note that these settings
in our observation have the broadest compatibility across devices/platforms/OS's and delivery methods.
Note: Android officially recommends Baseline profile: http://developer.android.com/guide/appendix/media-formats.html for MP4, but we have seen most devices 4.0 and above support main profile. This observation is also corroborated by the various blogs, like this one which says that main profile plays on most devices year 2010 onwards: https://www.jwplayer.com/blog/android-fragmentation-101-for-video-publishers/ .
So you need to decide whether to go with baseline profile or main profile. Recall that we are making 2014 and later devices mandatory. Also since we are converting to 720P HD video, an HD capable Android device also becomes mandatory - most HD capable Android devices should actually support the high profile.
Make sure 'Constant Quality' radio button is selected. To vary the size of the output file play around with the slider -
moving the slider to the left drops output quality and drops file size, moving the slider to the right improves output quality
and increases file size. Note that the scale is logarithmic not linear, so small movements of the slider either to the right or
left will cause dispraportionate changes in quality/file size.
Find the optimum setting for your camera/source/recording session. Once found you can keep this setting for other videos
from the same camera/source/recording session.
7. On the Audio tab recommended settings are the following:
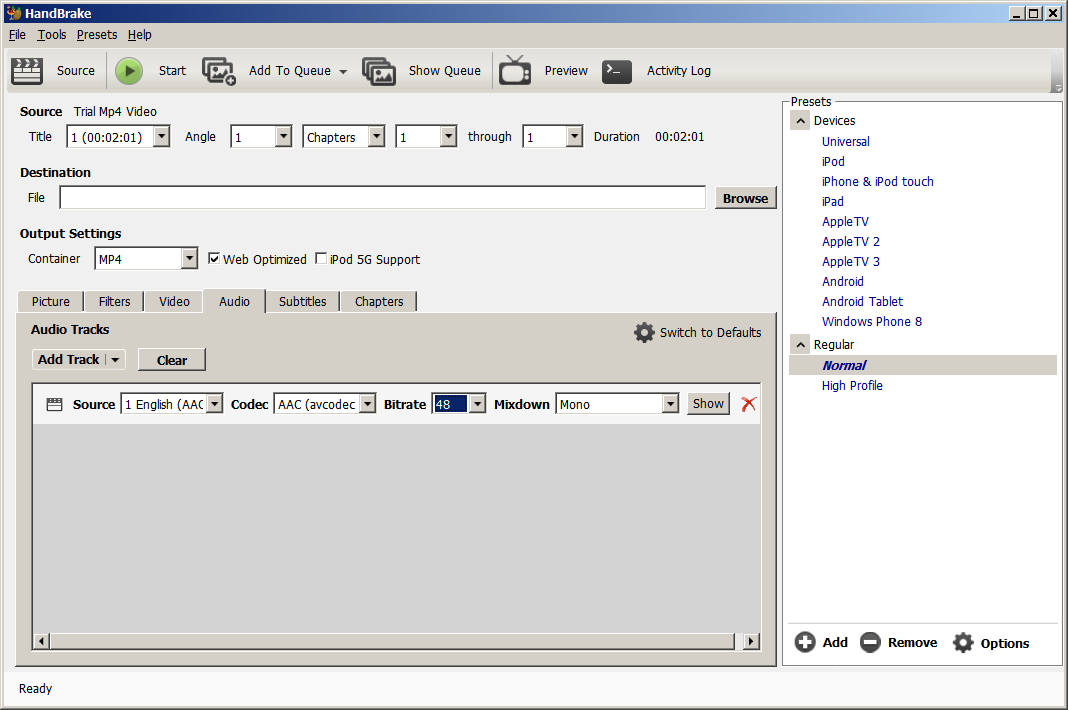
Note the options selected are for eLearning content where there is mostly human voice in one frequency band
and no music, recorded with high quality micro phones, digital cameras with no noise/hiss/hums/fuss in the background
(if you have these artifacts in the audio, please contact Arride we might be able to suggest clean up methods).
For human voice the settings which can give the lowest file size are: Mixdown: Mono (Streo can be
selected, but is of no use for constant human voice, dolby and higher are unnecessary). Bit rate can be selected
either as: 48 kbps recommended (or even as low as 32 kbps). Compare this with mobile phone conversations which
are 8 kbps !
Leave Codec as AAC(avccodec) which in our experience has the broadest compatibility across devices/platforms/OS's.
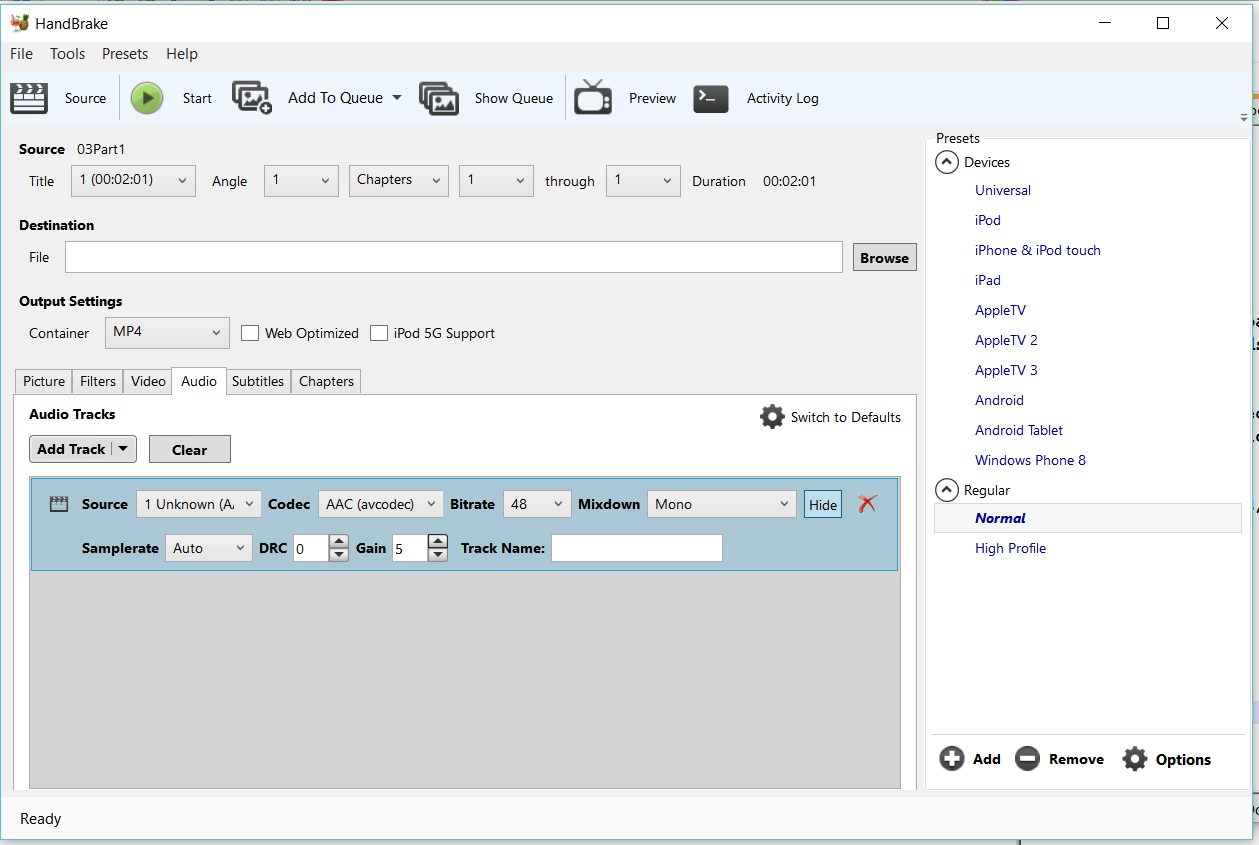
8. Optional Increase Audio Volume
If audio volume in any of your videos is low, or you would like to increase volume,
you can take the opportuinity to boost it here.
On the Audio tab, click on the Show button at the end of the Source row (right before the red X mark), the
audio options section should become visible as below. In the Gain section select a value from 1 to 10
depending upon the amount of audio amplification you need. Avoid high settings like 9 or 10 which can distort
the audio. Generally a 5 level provides a good balance between audio amplification and sound quality.
 9.
9. Recommended settings are done. Click the Start play button to start compression.
Itertaive Process
- In your first iteration try compressing a representative small 200 - 300 MB video file with the Quality
slider on the Video tab at 20. Compare the quality of the compressed video to the original.
- Output should look almost identical to the original for good source quality shoots.
- Now move slider to the left to 25 and try the same compression again. Check output quality.
- If quality still looks good, try with a lower setting like 27. Note that scale is logarithmic not linear
so small movements of the slider to the left will result in dispraportionate reduction of file size and
quality.
- Try a compression and check output quality against the original. If output still looks good try with a
slightly lower silder setting and iterate a few times.
- Note that you should be able to achieve 4 hours per GB of 720p (1280 x 720) video using this method.
Once you have reached this level you can stop moving the slider to the left.
- Once acceptable slider setting is found, this is now the reference setting for a camera/studio/recording
session combination.
- Bulk compression of many video files together can now be done using this slider setting.
Tips and Tuning Paramaters:
1. For testing purposes don't try to compress a 1 GB source file. Instead create a small representative
200 MB source file of 5 to 10 minutes duration and compress it repeateadly for trial and testing purposes.
2. Depending upon on your source video quality, try to do move the 'Constant Quality' slider on the Video tab
as much to the left as possible without a noticeable drop in quality.
3. Note that a Constant Quality setting is only valid for a video camera shoot session/sequence. E.g. the setting
that is giving you good compression in a studio setting with clean background and no audio noise might not
give you similarly good compression in case of a class room shoot with variable lighting and lot of background noise.
How to compress an more than one file at a time in Hand Brake:
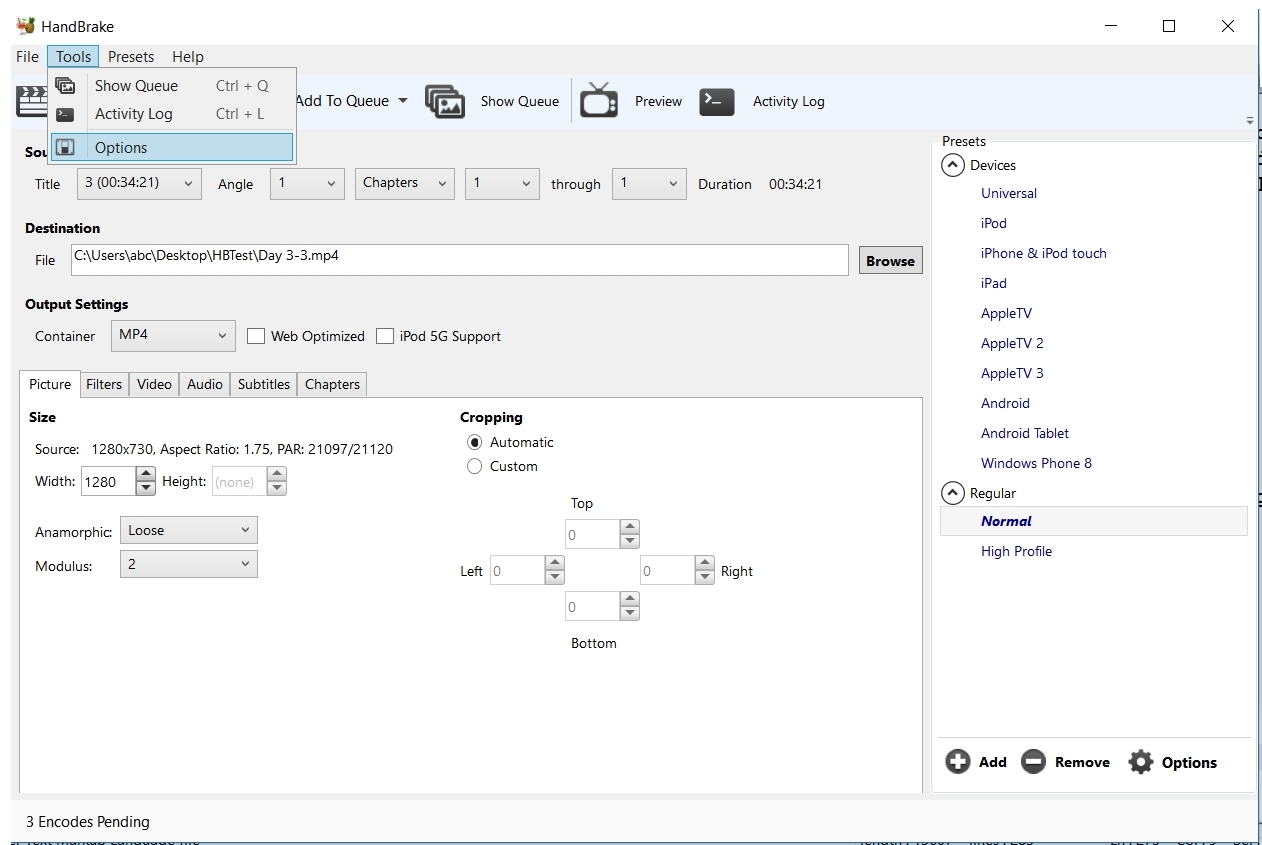
1. Close Handbrake if already open and Restart Handbrake. DO NOT do any video/audio compression settings.
Click on the Tools menu -> and select Options
2. In the Preferences Dialog -> Click the Output Files sub menu on the left -> then select the
Default Path to save the output video files to (click the Browse button if necesary).
In MP4 Extension Dropdown select: Always use MP4 option.
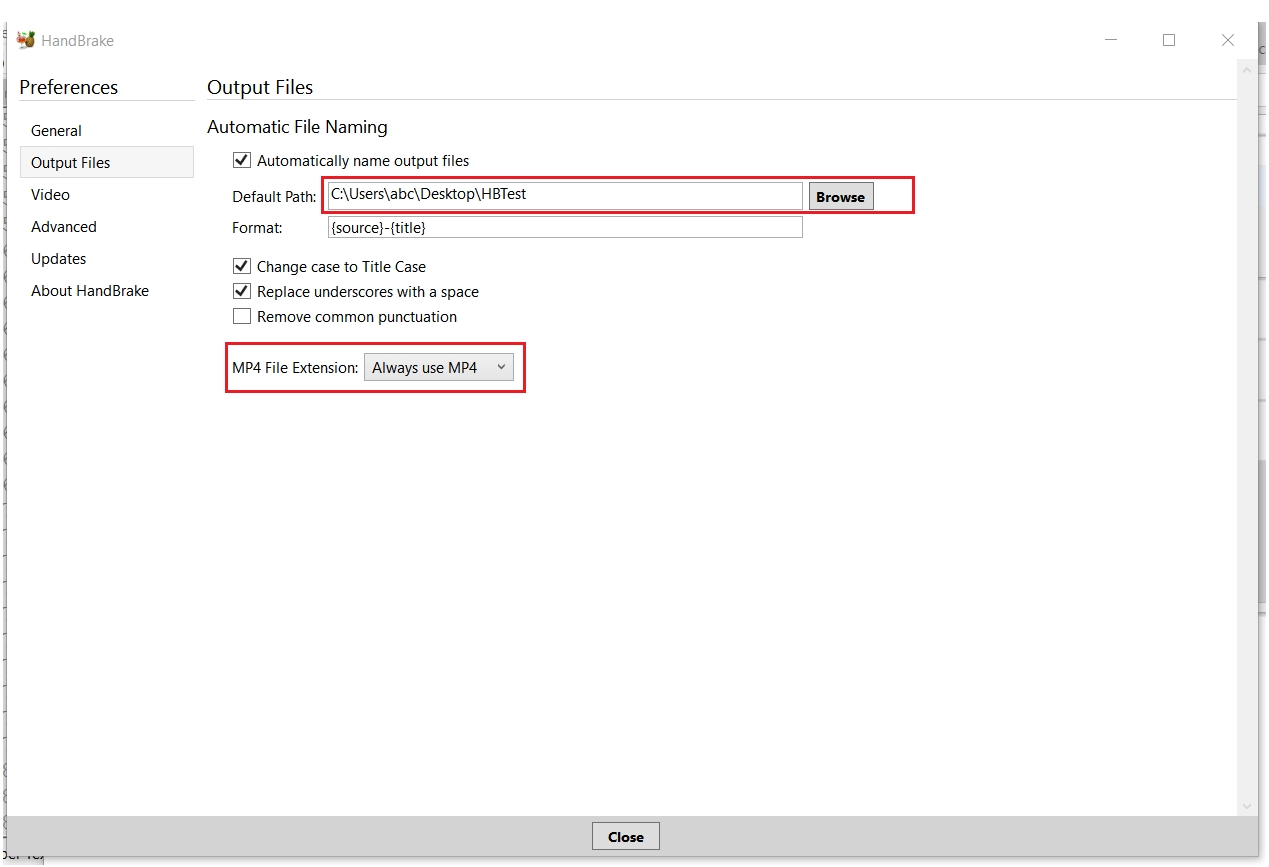
Click Close to close the dialog.
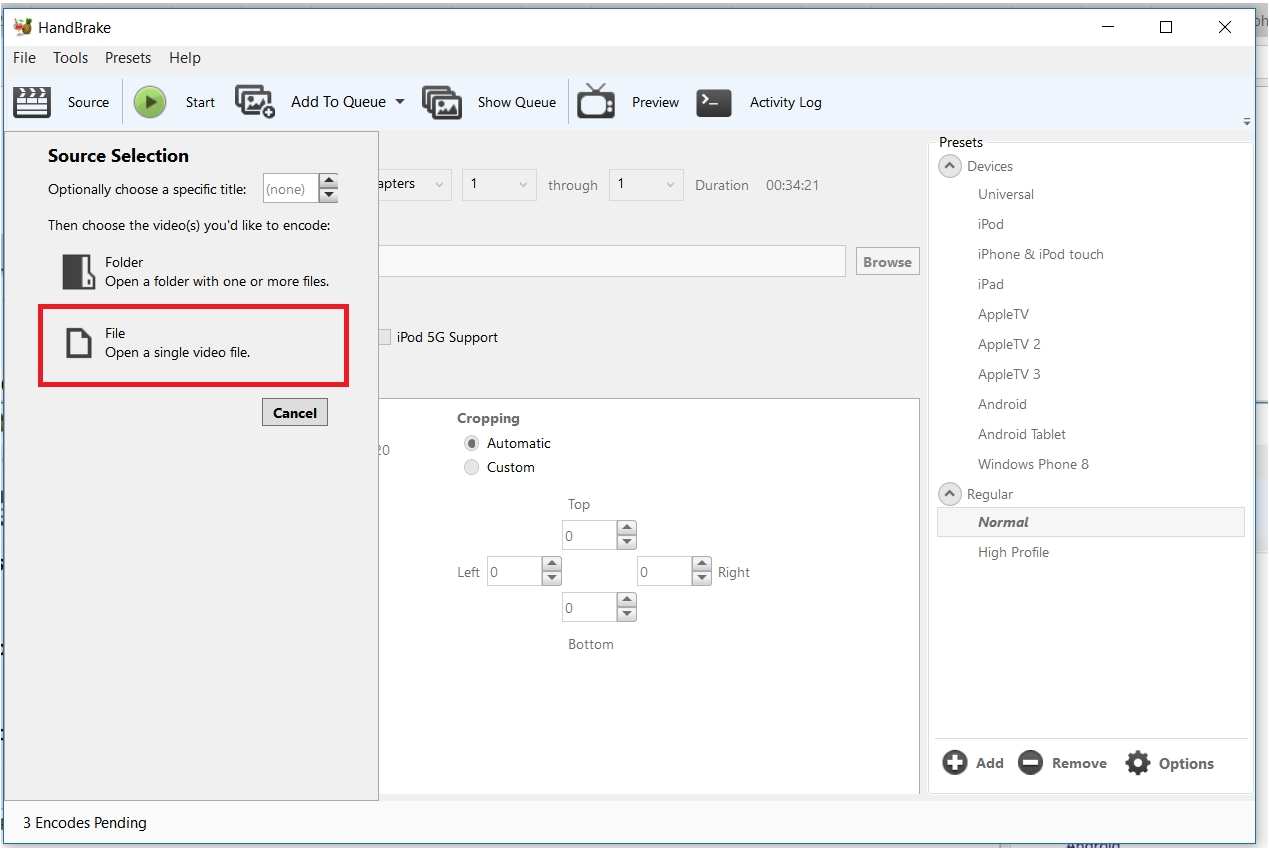
3. Click on the Source button and click on the File option - DO NOT click on the Folder option
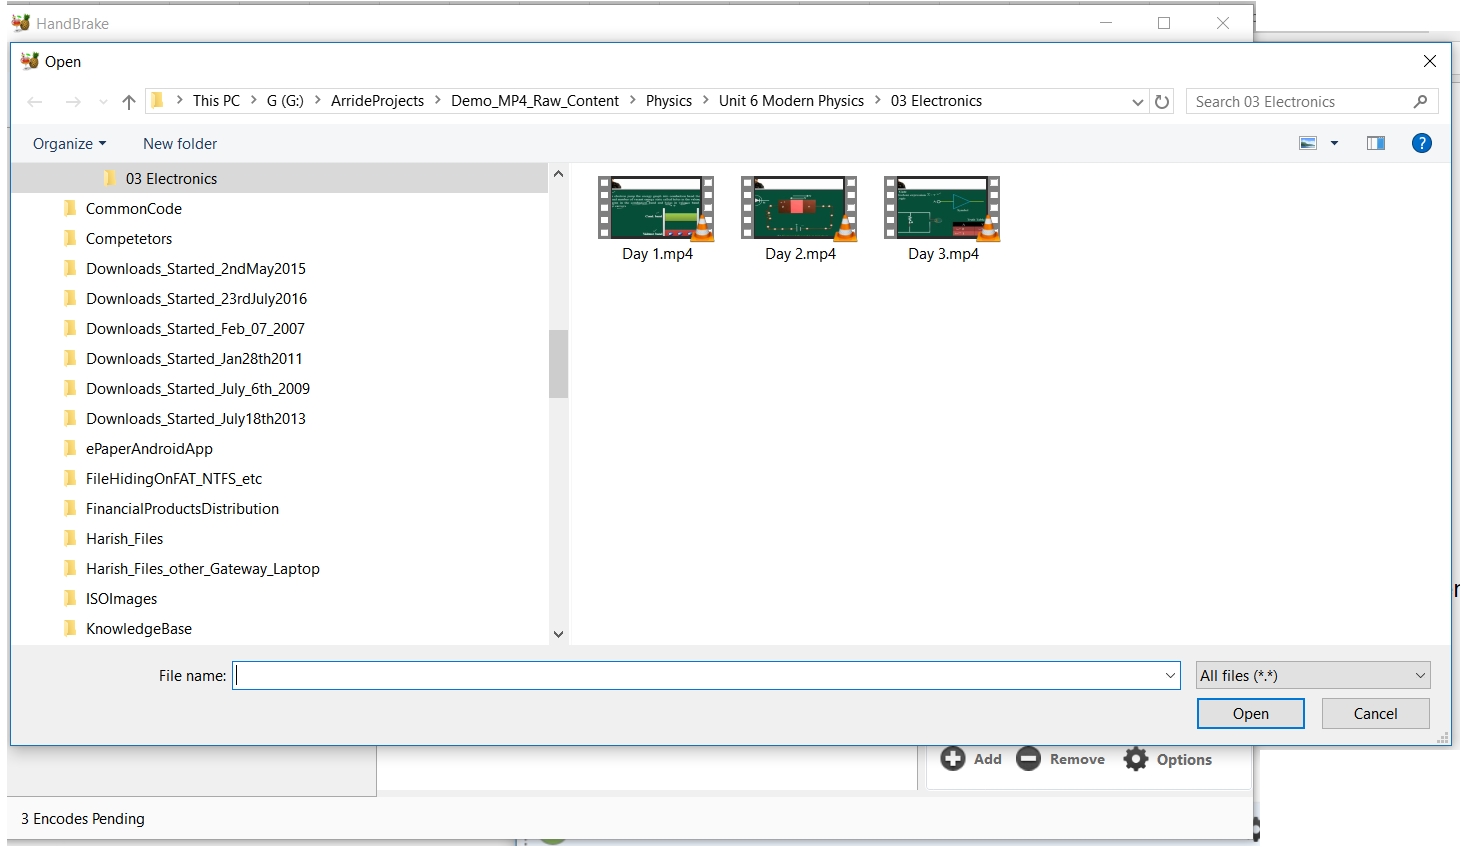
4. Browse to the folder where your source files are kept and Select any ONE file and Click Open
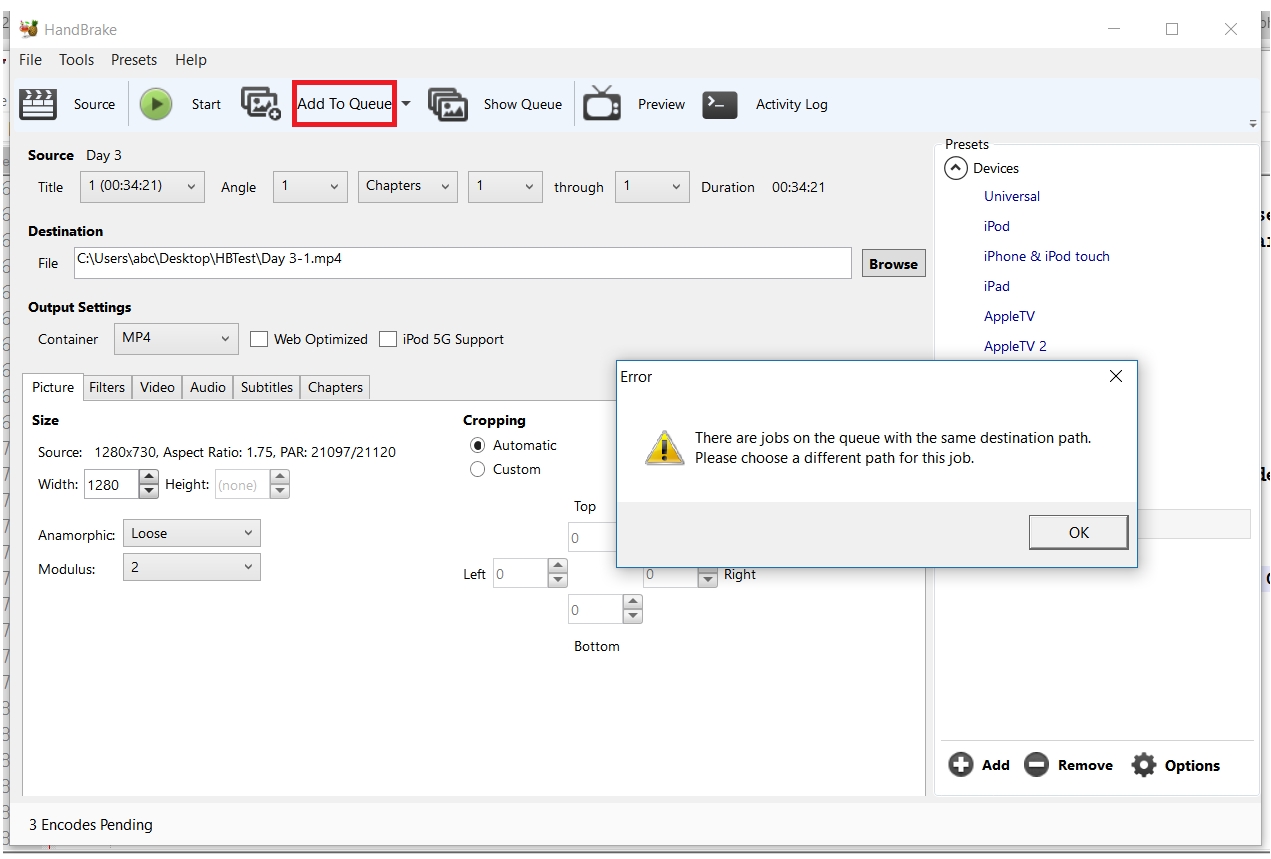
5. Click the "Add To Queue" words at the top (DO NOT click the small down arrow besides the words).
If you get a warning like the following, then ignore the warning and click ok.
6. Click the "Show Queue" button at the top and move/resize the Queue window to the right of the main window.
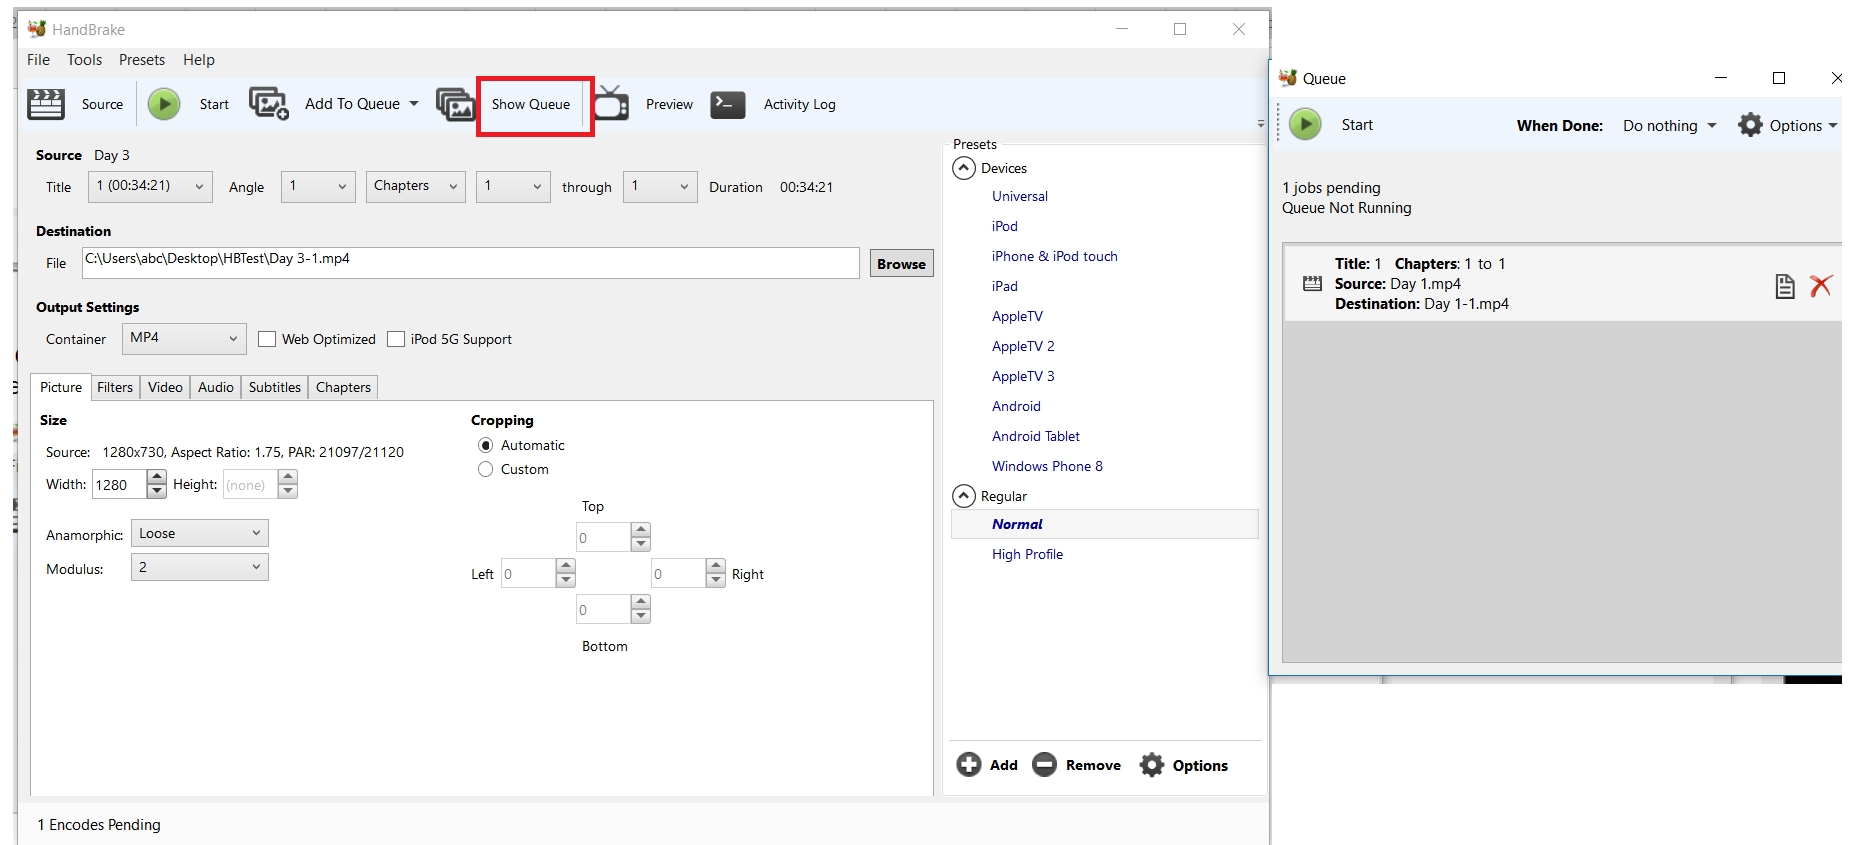
7. Repeat steps 3 to 5 and add one file at a time to queue for as many files as you want to add to queue(Click Source -> File -> Select File -> Click 'Add to Queue'). Newly added file should show in the queue:
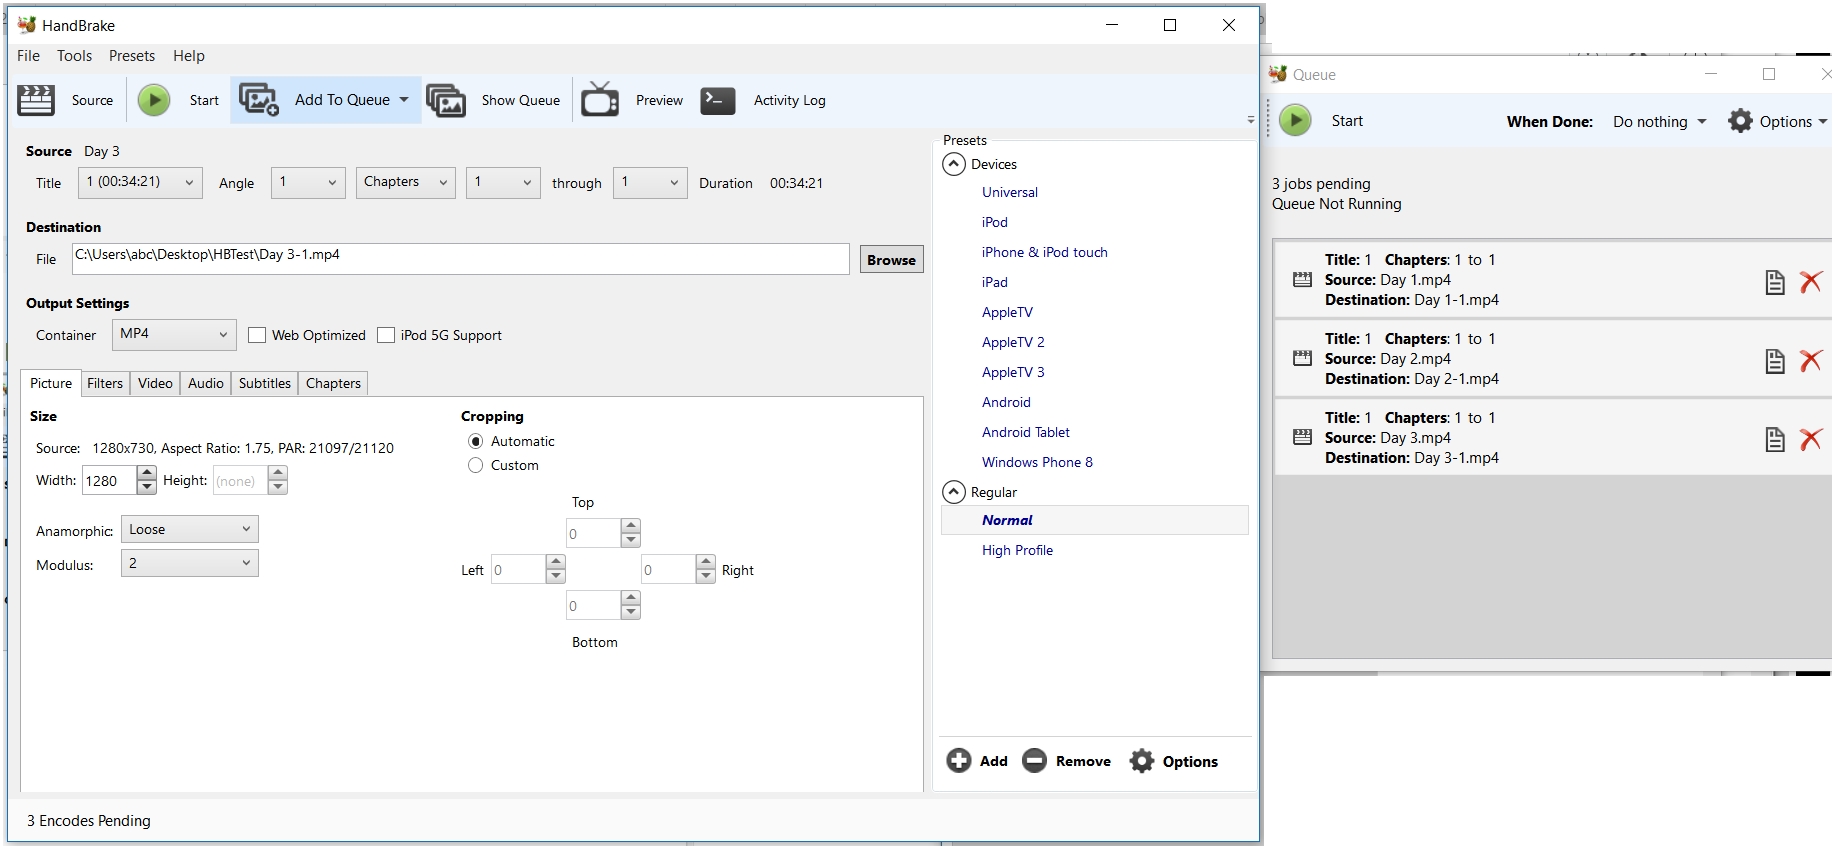
8. After Adding ALL the files you want to compress to Queue now do the video/audio settings as necessary to compress
the video files. (Setting guidelines are given above).
9. Click the Green Start Play Button to start processing the queue.

